Webhook Setup
This guide will help you configure webhooks to receive real-time notifications from the Paystand API.
Prerequisites
Before setting up webhooks, ensure you have:
- A publicly accessible HTTPS endpoint
- A valid SSL certificate on your webhook URL
- The ability to process HTTP POST requests
- Access to your Paystand dashboard to enable webhook events and add URLs
Configuration Steps
1. Prepare Your Endpoint(s)
Create at least one HTTP endpoint that can:
- Accept POST requests
- Process JSON payloads (Content-Type:
application/json) - Respond with 2xx status codes for successful processing
- Handle webhook events within 15 seconds
Example endpoint structure:
POST https://your-domain.com/webhooks/paystand
Content-Type: application/json
2. Configure Webhook URL
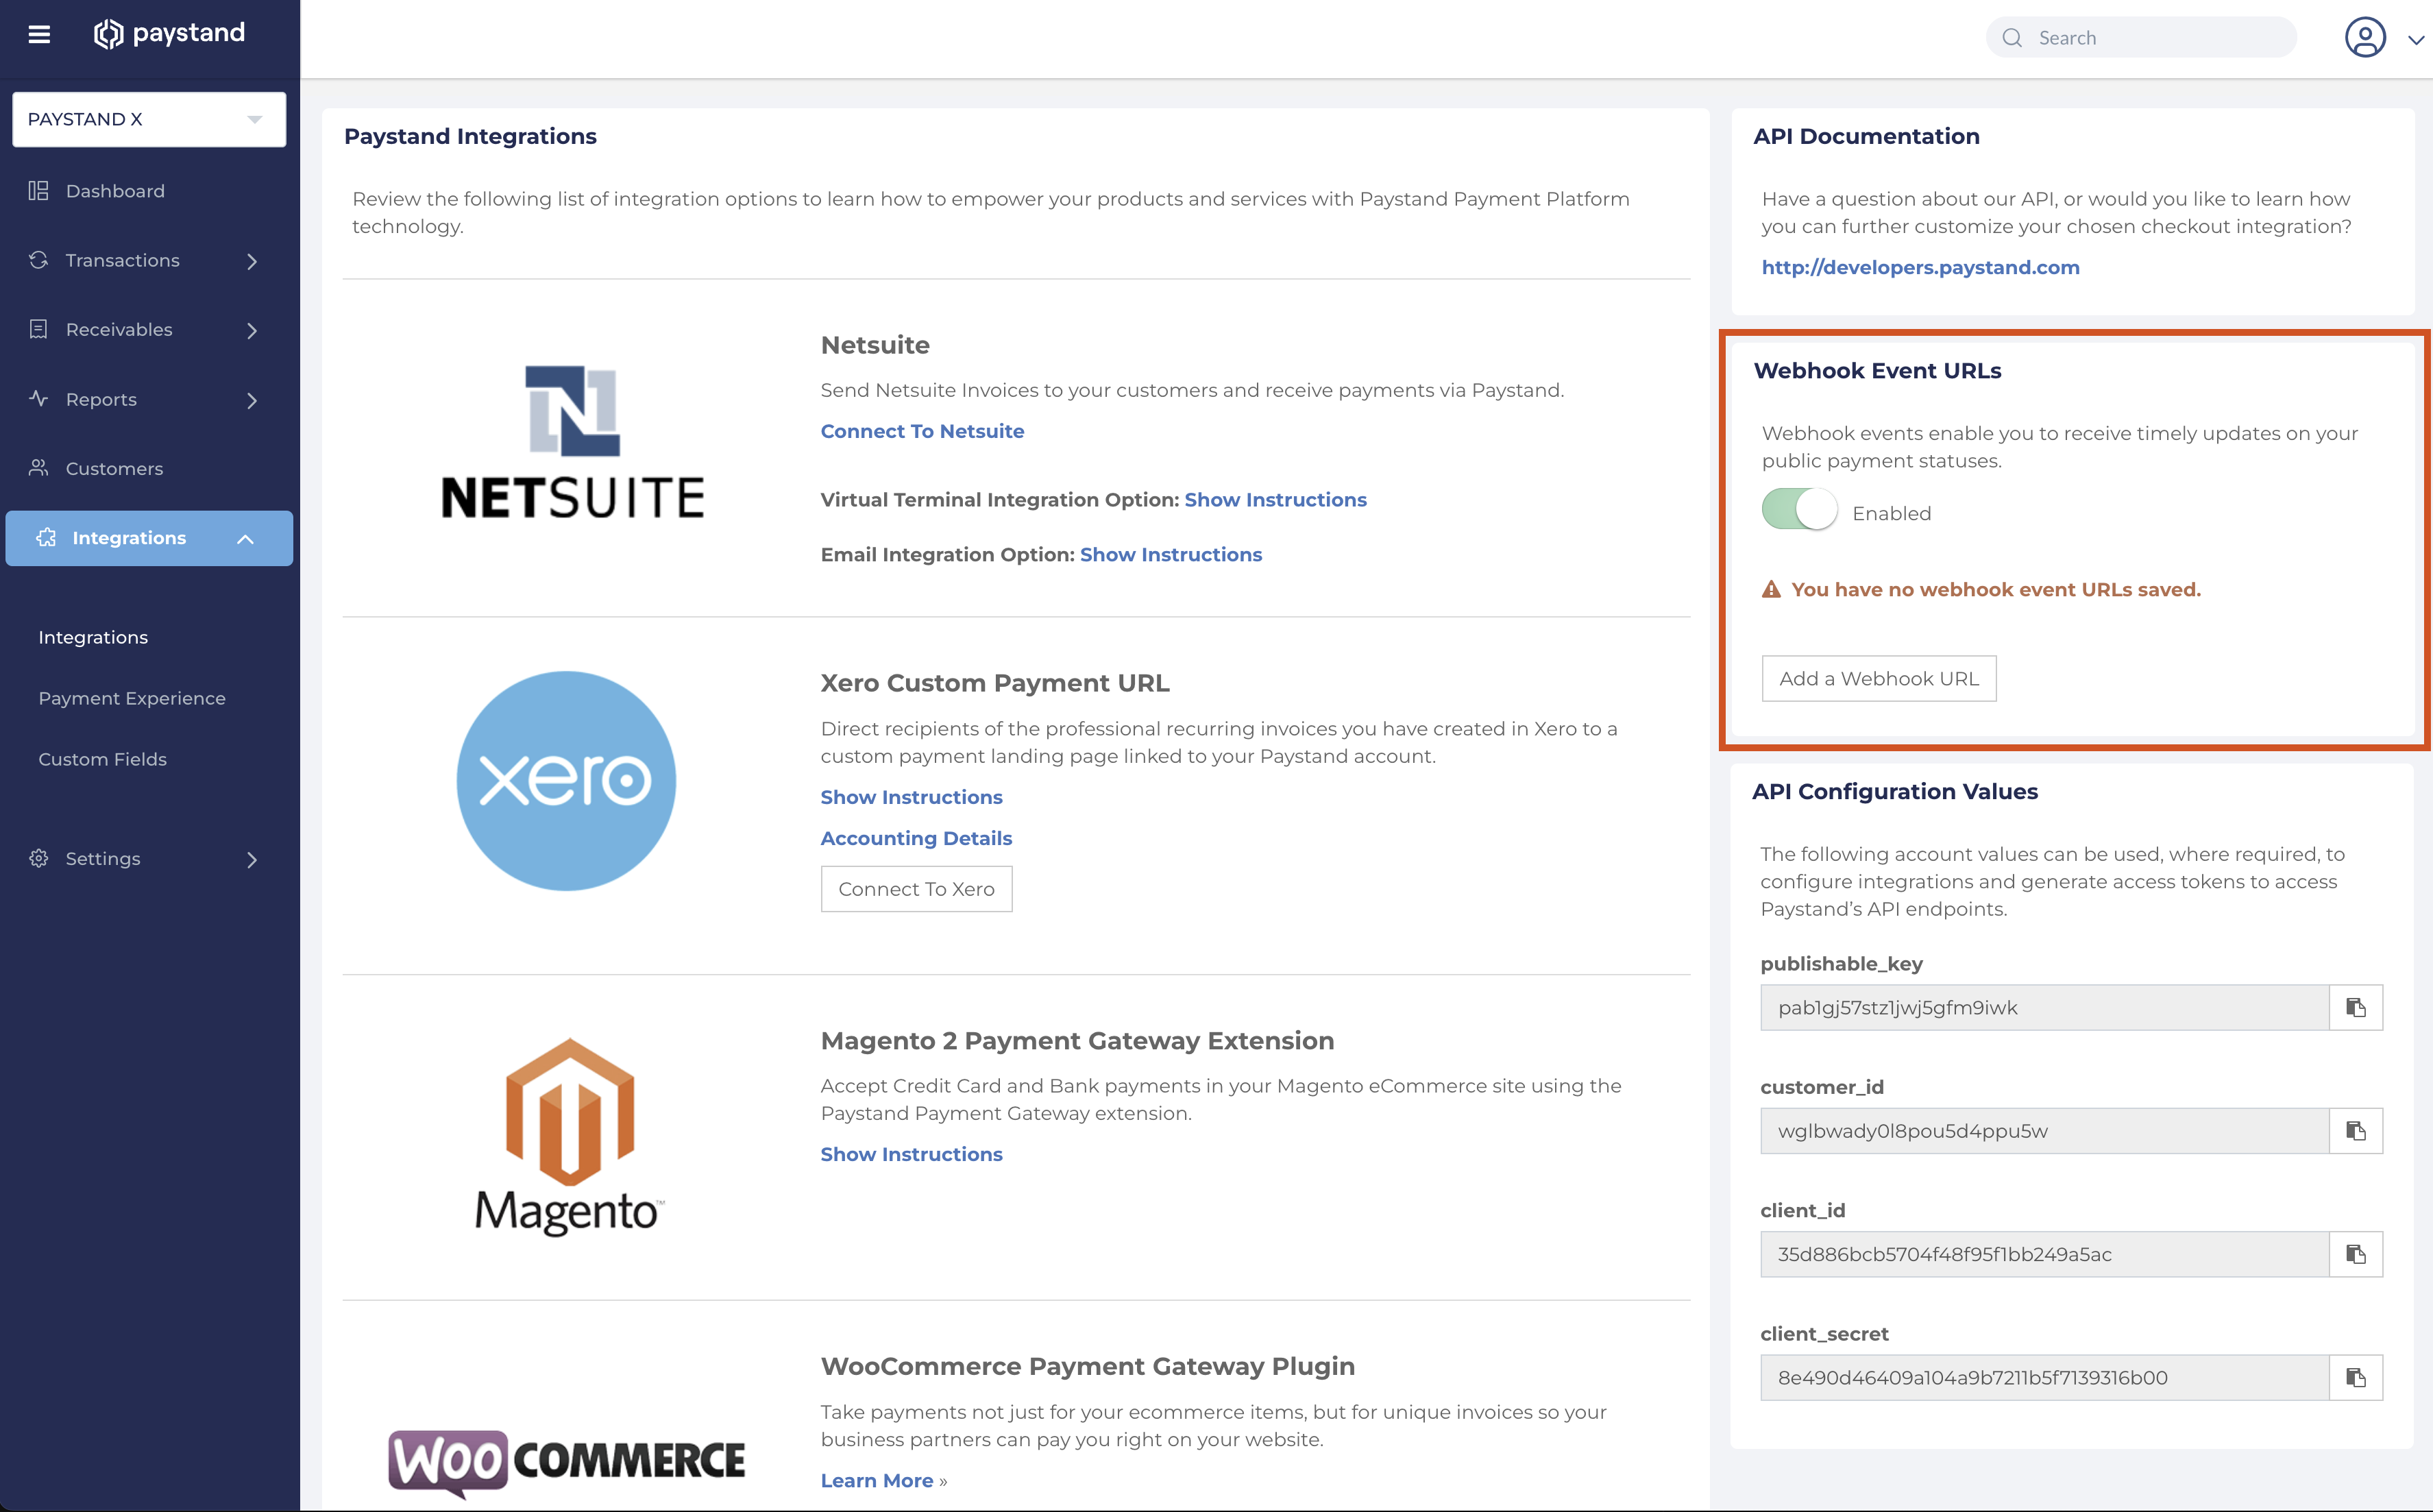
- Log into your Paystand Dashboard
- Navigate to the Integrations section in the main menu
- Locate the "Webhook Event URLs" section
- Enable the option to receive events
- Add one or more webhook URLs
3. Event Structure
All webhook events follow this format:
{
  "object": "event",
  "id": "event_unique_id",
  "resource": {
    "object": "payment", // Possible values: payment | receivableTransactions | refund | dispute | transfer | fee
    // Event data
  },
}
4. Response Requirements
- Return HTTP status 200-299 for successful processing
- Respond within 15 seconds
- Include appropriate headers if needed
Testing Your Webhook
Test Tools
- Use webhook.site for initial testing
- Set up ngrok for local development testing
- Monitor webhook delivery in your logs
Sample Test Event
You can expect events in this format:
{
  "object": "event",
  "id": "8low3hlfk1a7t08trm7043aw",
  "resource": {
    "object": "payment",
    "id": "z925xxrdroxxptdply1rxw4n",
    "status": "paid",
    "amount": "100.00",
    "currency": "USD"
  },
  "diff": {
    "previous": {
      "status": "processing"
    },
    "changes": {
      "status": "paid"
    }
  },
  "sourceType": "Payment",
  "status": "active"
}
Security Considerations
- HTTPS Only: Always use HTTPS endpoints
- IP Whitelisting: Consider restricting access to Paystand IPs
- Request Validation: Validate event structure and required fields
- Duplicate Handling: Implement idempotency using event IDs
- Rate Limiting: Implement appropriate rate limiting on your endpoint
Error Handling
Common Issues
- Timeout: Endpoint takes longer than 15 seconds
- SSL Errors: Invalid or expired certificates
- 404 Errors: Webhook URL not accessible
- 500 Errors: Server-side processing failures
Debugging Steps
- Check endpoint accessibility from external networks
- Verify SSL certificate validity
- Monitor server logs for processing errors
- Test with webhook testing tools
Multiple Webhooks
You can configure multiple webhook URLs for:
- Different URLs for different event types
- Backup URLs for redundancy
- Development vs production environments
Important: If you set up more than one webhook URL, all URLs will receive all events. There is no way to define which events you want to receive per URL.
Next Steps
After setup, configure specific event types:
- Payment Events: Real-time payment status updates
- Transaction Events: Invoice payment notifications
- Transfer Events: Payout and settlement updates
- Refund Events: Refund processing notifications